Enable Remote Desktop remotely by using the registry

A few times I have encountered the fact that I cannot access a remote workstation or server by Remote Desktop (RDP). To solve this you can enable RDP trough a registery key remotely. The following steps can be taken to enable RDP remotely.

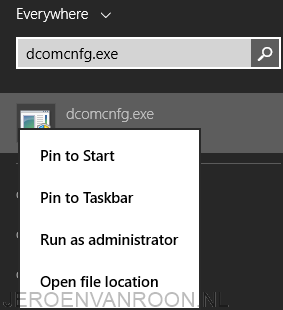
  1. Log in on a computer or server as an Domain Admin and open Regedit as an administrator.
  2. On the File menu, click Connect Network Registry.
  3. In the Select Computer dialog box, under Enter the object name to select, type the computer name and then click Check Names.
  4. After the computer name resolves, click OK.
  5. In the computer node that appears in the Registry Editor, navigate to HKEY_LOCAL_MACHINE\SYSTEM\CurrentControlSet\Control\Terminal Server.
  6. In the console tree, click Terminal Server, and then, in the details pane, double-click fDenyTSConnections.
  7. In the Edit DWORD Value box, in Value data, type 0, and then click OK. This value enables connections at the level that allows connections from computers running any version of Remote Desktop.

To implement the change, restart the server or workstation remotely, as follows:

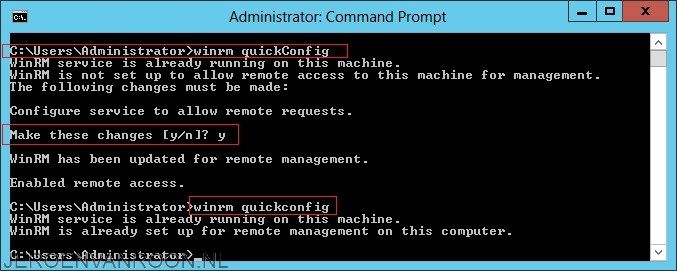
  1. Log in on a computer or server as an Domain Admin and open Command Prompt as an administrator.
  2. At the command prompt, type the following command: shutdown /m \\[Name of computer that has to be rebooted] /r

Remote manage Hyper-V host without domain

While setting up a test Hyper-V lab I have been doing a few steps to remotely manage both Windows Server 2012 R2 and Windows 8.1 machines. Both machines are in a WORKGROUP. To make remote management of Hyper-V possible a few steps are required.

Step 1

Enable WinRM on both machines. This can be done trough an elevated command prompt. The command used for enabling WinRM is:

  • winrm quickconfig

sm_winrm

Step 2

On the Hyper-V Management client open cmd.exe as administrator and add the server as a trusted hosts. Here you can comma separate to add multiple machines.

  • winrm set winrm/config/client @{TrustedHosts=”PC-I5″}

Step 3

On the Hyper-V Management client add credentials to make the connection possible.

  • cmdkey /add:PC-I5 /user:ADMINISTRATOR /pass:Password

Step 4

The last step that needs to be done is allowing Remote Access for Anonymous Logon. This has to be configured on the Hyper-V Management client. This can be done by following the next steps.

  • Type ‘dcomcnfg.exe’ in the Windows Search field and run this as admin.

2015-03-09 21_41_49-Start menu

  • Right click my computer and click properties.

2015-03-09 21_45_26-

  • Go to the tab COM Security and click ‘Edit Limits’

2015-03-09 21_48_33-My Computer Properties

  • Allow ‘Remote Access’ by ‘ANONYMOUS LOGON’

2015-03-09 21_49_09-Access Permission

  • Click ‘OK’ and start Hyper-V Manager again. At this point you’re able to manage the Hyper-V host remotely.

2015-03-09 21_50_13-Hyper-V Manager

Set Network Location to Private in Windows 8.1 or Server 2012 R2

Sometimes a new Network Location gets mis-identified as Public when it should be Private, or the other way around. Changing this in the GUI is certainly possible, but the PowerShell method is faster. So let’s take advantage of the improved Windows PowerShell support in Windows 8.1 and do it quickly and easily.

2014-10-21 21_14_00-2012R2-DC02 on I5-PC - Virtual Machine Connection

First, let’s open up an elevated PowerShell window from our user session and find out what our current network location is set to:

  • Get-NetConnectionProfile

2014-10-21 21_12_20-2012R2-DC02 on I5-PC - Virtual Machine Connection

From this, we see that the problem interface has an Interface Index of 12. To change the network type execute the following command:

  • Set-NetConnectionProfile -InterfaceIndex 12 -NetworkCategory Private

2014-10-21 21_13_11-2012R2-DC02 on I5-PC - Virtual Machine Connection

The network has been changed to a Private Network.

2014-10-21 21_13_40-2012R2-DC02 on I5-PC - Virtual Machine Connection

Retrieve WMI computer model name

At deployment phase MDT uses WMI to query the proper computer model and only the current model drivers will be injected. In order to get this working properly, you have to use the exact model name in your Out-of-Box Driver treeTo build up an MDT deployment based on the the model name of your hardware you need to now the name of the hardware. To retrieve the proper computer name execute at command prompt:

  • wmic csproduct get name

Use this command to get the exact WMI name to determine the computer model. In my case the computer name is “HP EliteBook 8460p”.

WMI computer name command

Now that we have the computer name in MDT, the correct folder can be created and the drivers can be imported.